Pen Drive, SD Cards or USB Flash drives are common devices to transfer data from one computer to another. Sometimes we get errors while connecting Pen drive to Computer and during data transfer one of them is Shortcut Error, basically, this is a Virus known as Shortcut Virus, it converts every file into shortcut in Pen drive / Hard drive / USB Drive.
In this article, we will guide you, how to remove shortcut virus from your flash drive as well as computer.
What is Shortcut Virus and How does it Works?
When we connect a removable drive to a malware affected computer and transfer any file from PC to flash drive it automatically infect Pen drive and all files appears as Shortcut.
This virus can affect any external storage like Flash Drives, External Hard disk, Phone Memory or Memory card. In infected drive, we get shortcut of files which were in USB drive if you try to open any file you will get error message.
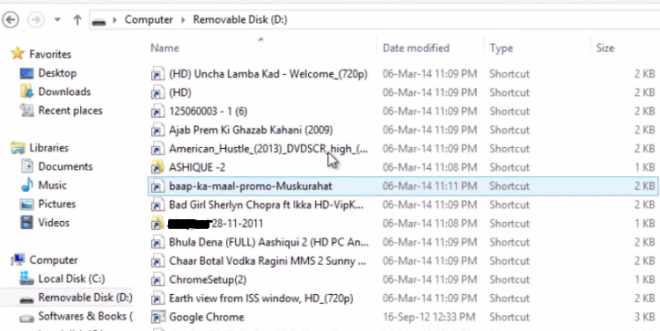
In below snapshot, you can see how files looks like shortcuts in a Removable Disk.
How to Remove Shortcut Virus From Pen drive / USB Drive.
If your USB drive doesn’t have important files you can try to Format it, but if it contains important files then you are not going to format it.
To Remove Shortcut Virus manually follow the Steps Below.
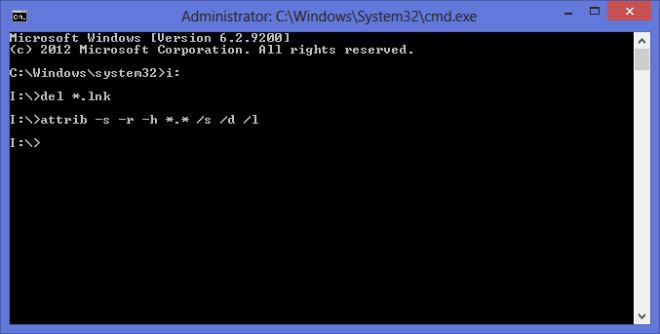
Step 1) Go to Start and Search for cmd, as it appears in start menu Right Click on it and Click “Run as Administrator”
Step 2) Navigate to Flash Drive by typing its letter. [ Let’s Say it is i ], to find your USB drive letter open “My Computer” and check for the letter, type i: and hit enter.
[Any mistake in below command may cause data loss so be careful while executing del *.lnk command, you must be in correct Drive]
Step 3. Type “del *.lnk” (without quote) in cmd window and Hit Enter on your Keyboard.
Step 4. Now type “attrib -s -r -h *.* /s /d /l” (without quote) and hit Enter .
It will take few seconds to recover all your files, Now open your Flash Drive you will get all of your files back.
How to Remove Shortcut Virus from Affected Computer.
Once you recover files which were in USB drive you can use them. But if you again plug in USB Flash drive into the infected computer your flash drive will infect again. So it is better to remove the source of this virus i.e infected the computer, follow the steps below to remove shortcut virus manually from the computer.
Step 1) First open Task Manager by pressing Ctrl + Alt + del Or Right Click on the taskbar and click on Task manager.
Step 2) Go to Process tab and look for process Wscript.exe, Scroll down and find any such process, Now Right Click on it and Click on End Task.
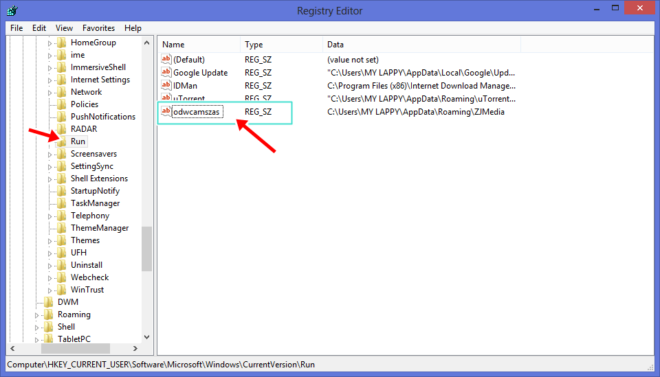
Step 3) Now go to Start and search for “regedit“, open it you will get Registry Editor navigate to
HKEY_CURRENT_USER/Software/Microsoft/Windows/CurrentVersion/Run
Here look for Registry Keys “WXCKYz“, “ZGFYszaas“, “OUzzckky“, “odwcamszas“. If you find any of them then right-click on it and delete this registry key. If you don’t find exact registry key then look for similar registry keys and search them on google to know what they do.
This will remove Shortcut Virus from your Computer, if not then try these steps.
1. Press Windows + R key, you will get Run box, type %temp% here and hit OK, now temp folder will be open look for file “nkvasyoxww.vbs“, “WXCKYz.vbs“, “ZGFYszaas.vbs“, “OUzzckky.vbs” or such random/meanings-less named files and delete it.
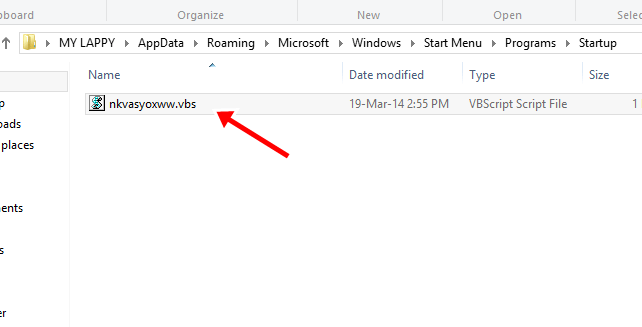
2. Go to C:\Users\<username>\AppData\Roaming\Microsoft\Windows\Start Menu\Programs\Startup. Check Startup folder if nkvasyoxww.vbs and other similar .vbs files exist here then delete them.
3. Press Windows + R key, type “msconfing” into the run dialog box and hit OK, it will open System Configuration, Go to Startup tab, and look for nkvasyoxww.vbs and other similar .vbs files uncheck them from startup and hit OK.
There may be a different name for the VBS file, just make sure you don’t have any file with an unusual name and VBS extension at the startup, registry, and temp folder.
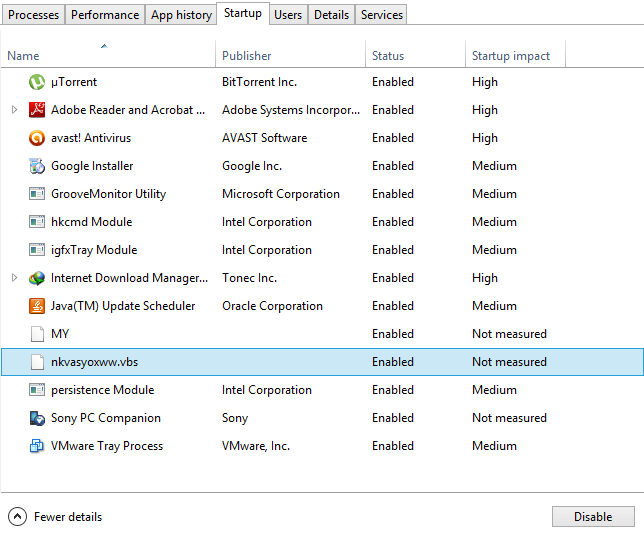
In Windows 8, Open Task Manager and go to Startup tab, disable nkvasyoxww.vbs from here.
Ref: iTechFever


